In the world of shooting guns, zeroing your rifle is an essential task, and if you want to pursue the sport as a profession, then knowing how to zero a rifle scope at 100 yards is important.
Well, you must be querying, why are we particularly discussing 100 yards? Why aren’t we talking about 50 yards or less or even more than 100 yards? You see, 100 yards can be considered as the milestone, so once you get the hang of that, we are quite sure that you would be able to do the task for any distance.
Nevertheless, zeroing a rifle scope is no child’s play. It takes a lot of practice and experience to do the task. However, thanks to this article, the trick will become quite easy for you! Before we begin make sure you have the best scope for 100 yards.
What Is Zeroing Your Rifle Scope?

When you see the definition of zeroing a scope, it actually doesn’t sound or seem that complicated. “Zeroing” is considered as the deed of adjusting the scope or optics to the barrel.
By doing this, you are making sure that it is in tune or is aligned with the crosshair and gives you are a more accurate measurement of where its bullet is going to fall.
In short, such a straightforward-sounding job can be considered as an essential thing while shooting a rifle and can be the deciding factor of whether you hit the target or not. Furthermore, we have already stated that it sounds easy, but in reality, even pros face a tad amount of issue while the whole zeroing their scopes.
How to Zero a Rifle Scope at 100 Yards
Though zeroing a rifle scope at first can be troublesome, but once you get the hang of it, you surely won’t be facing many issues. So, here are the steps that you need to follow while zeroing your scope!
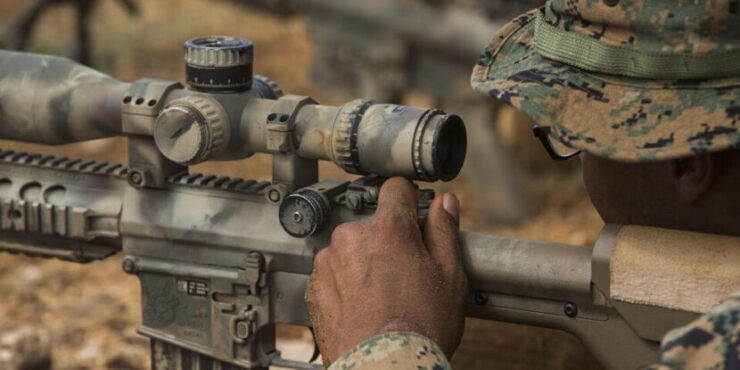
Step-1 (Understand Your Scope)
It doesn’t matter whether you are a pro or a novice, having a clear understanding of your rifle scope will make the whole process easier. By that, we mean that you should try to know all the features of the scope that you are using. Yes, that includes the range, the reticle, and everything.
Now, understanding the type of reticle is probably the most significant part of knowing your scope. And to do that, you need to know the type of reticle that your scope has, MIL or MOA? Here is what you need to know about them.
MIL
MIL reticle or MIL-Dot reticles are the names used for reticles that have a pattern of the duplex crosshair with four 0.25mil dots on each axis. And you see, the space between any two dots in the MIL reticle represents 1 yard or 39 inches for every single mil.
MAO
MOA stands for minute-of-angle. And it is these angular deviations that are used to find the correct trajectory for the bullet that you are shooting. A straightforward representation is 1 MOA is 1.05 inches at 100 yards, 2 MOA is 2.1 inches at 200 yards, and so on.
Step-2 (Fix It on a Level Platform)
While zeroing scope, you must set the scope on a flat and smooth surface. Even the slightest hindrance or distortion, might cause you to miscalculate the calibration, which can bring you results that you do not want. Therefore, we suggest that you do not rush in this stage and take it slow.
Another thing that you can do is opt for a higher quality of mounts! The cheaper mounts might be more affordable, but they will lack the accuracy of those higher-end mounts can provide. Plus, make sure that you are using factory-approved mounts and torques. And to work with the torque, use appropriate torque wrenches.
Step-3 (Use Boresighting)
Once you are done with the mounting stage, you should be using the boresight technique! In this method, you align the iron sight or the firearm’s sight to the barrel, which is a good start if you want to raise the precision of your work. Besides, if you want a painless and straightforward alignment, then this is the one to follow.
Also, make sure that you have top-notch accessories to do the task, and if you are DIYing, then we suggest that you purchase a laser or manual muzzle insert for your gun. In short, such a method is a fantastic way of saving up ammo and your frustration!
Step-4 (Start Small)
Jumping to Zeroing 100 yards might not be a very smart idea. You see, even with the most accurate boresight, there is no assurance that you will be hitting the target, so we suggest you start small and do an error-and-fix session, where you use the scope to shoot and make the adjustments accordingly.
Our recommendation would be starting from 50-yards and taking three shots. After you are done with that, assess, and make all the major improvements in this session. Keep repeating until you get suitable results. By the way, remember this:
At close range, you need to multiply adjustments, which means, if at 50 yards you get 8-clicks (which is one inch) to the target, then you would need 4-clicks for 100 yards.
You need to keep making the adjustments until you get a clean shot on the target! After you are done with that, it is time for the next and final step!
Step-5 (Time for 100 Yards)
After you are done with the previous step, you can now move to 100-yards. In this step, we suggest that you don’t rush the process. Yes, indeed, after you are done with making adjustments at the 50-yard mark, the changes are minor at the 100-yard stage. However, there is always a chance of error.
So, we suggest that you keep testing until you are entirely sure that you have got the work done accurately. And to do that, just like at 50-yards, take three shots, and make the adjustments and until you get an accurate shot on the target at 100 yards.
Conclusion
Pro or novice, not everyone can accurately zero their rifle’s scope. And if zeroing a scope has been a troublesome task for you, then our article on how to zero a rifle scope at 100 yards will make the whole process easier and pleasant for you!