When purchasing a rifle for the first time, a lot of questions can come to mind. How do I adjust the range? And how effective will be the shots be? How is the power different from other rifles?
Among these, one particular query that beginning rifle-shooters tend to ask is how to sight in a riflescope without a boresight. This article will help you understand how to easily sight in a riflescope without a boresight by providing you with the right practice and information.
What Is a Boresight?
A boresight is a special device that helps the rifle user improve the sight when targeting. The sight-in process is a crucial aspect of rifle shooting, and without effectively learning it, a rifle is unsafe to use. To know how to sight in a riflescope without a boresight, some precautionary steps must be taken first.
Check Your Location
Before anything else, check your location. Since you’re attempting something as dangerous as shooting, you should be in a safe location away from unsuspecting individuals. You should also have a backstop within your shooting range so you can catch the shot rounds.
Not only will the backstop provide safety during the shooting, but you will also have a clear reference point to see how accurately your shooting is. Some beginners tend to miss most of their shots in the backstop, but don’t let such results discourage you.
Since you’re already trying to learn the process of sighting in a riflescope without a boresight, you should consider yourself more advanced than most beginners already.
Related Guide: close range scope buying guide.
Setup of the Rifle
Next, you must ensure that the riflescope is correctly attached to the rifle itself. You can check the scope mount by seeing if the eye relief is set properly, and then checking if the reticle focus is in the right position too.
Before attempting to shoot, you must also make sure you are resting on a solid platform. If your rest is wonky, you will have trouble during the sight-in.
Calculating the Range
Determining your range is important for the sight-in process, and for beginners, it is recommended to try a close range instead of a far one. Not only is it easier to shoot and control your shots in close range, but it also takes less time to collect shot rounds, thus saving you a lot of hassle.
Calculating the range also includes some precise calculations, but to make it easy for you, try a minimum distance of 30 yards first.
How to Manually Sight in a Rifle
The next steps require a bit more manual effort. Since you’re opting to not do automatic sight-in, keep in mind that manual boresight works best with bolt guns. If you’re using pump models or semi-autos, manual boresight is not really applicable.
Step 1: Remove the Bolt
However, if you do own a bolt gun, start the sight-in process by removing the bolt from the main compartment. This will let you see all the way down the barrel, enabling the first step towards manual boresight. Make sure your rifle is unloaded, place it, and the mounted scope towards the target.
Step 2: Envision Your Target
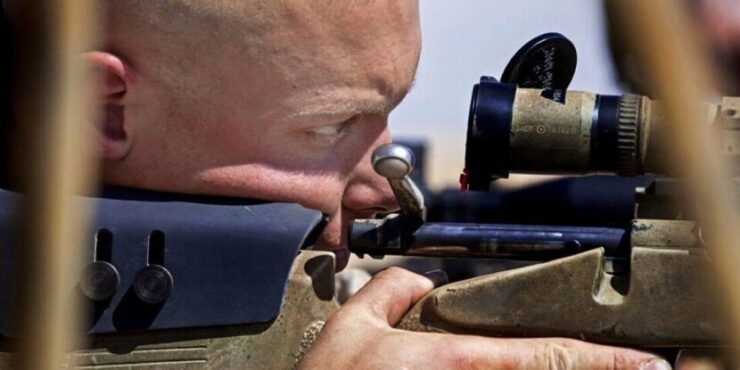
Position your head so that it is possible to see the scope and the barrel at the same time. It is recommended to try seeing down the barrel with your right eye and the scope with your left eye.
This helps get a good mental estimation for the target, and exactly where you might hit depending on your vision in the scope.
Step 3: Reload Your Rifle
With all that set, try loading some shots. And aim at the center of your backstop and fire a shot. The first shot alone should give you a good estimation of your range in relation to your scope.
A recommended technique is to put the crosshair of your rifle in the exact place for three consecutive shots. You will find that it is easier to calculate the effectiveness of three consecutive shots at the same place then three consecutive scattered shots.
Step 4: Adjust for the Setting
Regardless, adjust for wind resistance and height difference depending on the accuracy of the first three shots. Usually, the height is more of an impactful factor than anything else when it comes to accurate shooting.
After adjusting the height, take another shot. Check the backstop. Keep doing it until you hit at, or at least close to, the X spot on the backstop.
Step 5: Repeat the Process
Repeat the process until you get a good feel of the range and your accuracy. This personal adjustment is important to truly customize the needs of your rifle.
You should also try seeing how different the shots feel at different ranges. Go a bit further than 100 yards, adjust your scope, and see how the shots differ.
Step 6: Practice
For best results, fire three consecutive shots at the same spot to get a good range of your current accuracy.
After adjusting elevation and distance with the three-shot group, try ten shots at once after you’re comfortable with the position.
Tips and Tricks
• The difference in the number of shots will give you varying results, which will further let you have a better reading of how and where you are hitting the target.
• Keep in mind that if you are using a heavy machine with a lot of recoils, don’t try 10 shots at once.
• Keep it to a maximum of 5 at once for reduced impact, yet allowing you to judge your adjustments and edit them accordingly.
No Boresight? No Problem!
Once you train yourself in the method, you will realize you don’t need a boresight at all. A bit of manual self-adjustments is enough for effective rifle shooting.
So, through the process of trial and error, you will get the hang of how to sight in a riflescope without a boresight.