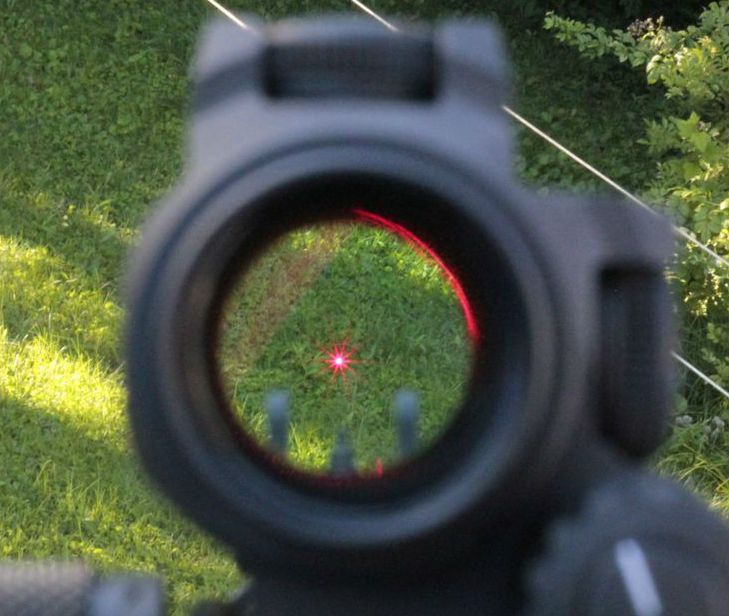
Red dot sights are the key to improve the way of an aiming target and also eliminating the traditional firing way by closing any one eye. It allows a single point of dot or focus by placing the target on nearly the same level of optical. It provides a perfect way to shoot.
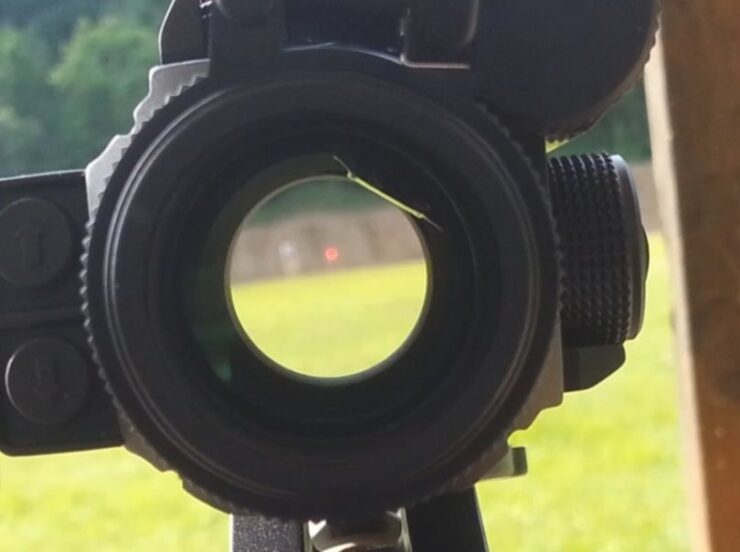
Red dot sight works perfectly and increases the chances of your success. But if you really want to make a red dot sight but don’t know how to make a red dot sight? So here is some instruction available for you to make your own red dot sight. It is very simple to make and fun project to do.
Making A Red Dot Sight:
Step: 1 What Kind of Materials You Need?
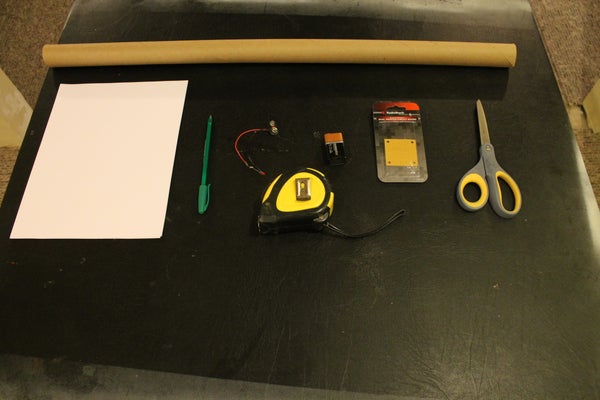
Cardboard tube
Plastic scraps
Red led
1,000-ohm resistor
Pen/pencil
Scissors
Ruler
Glue
9v battery and battery clip
Multiple sheets of paper
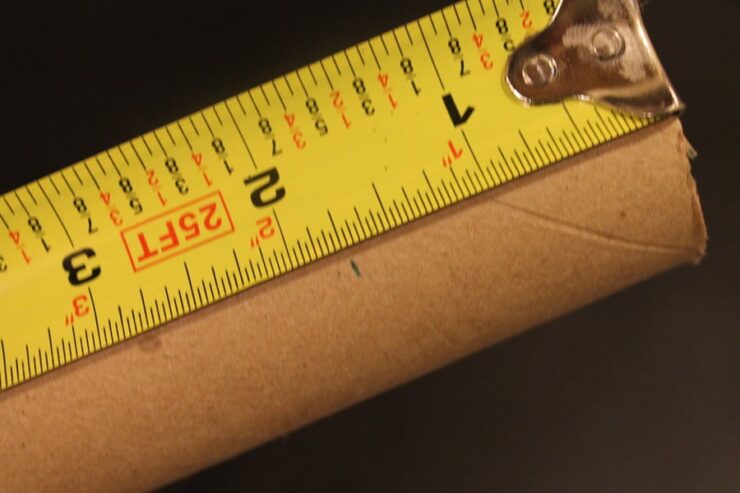
Step: 2 Cut Your Tube.
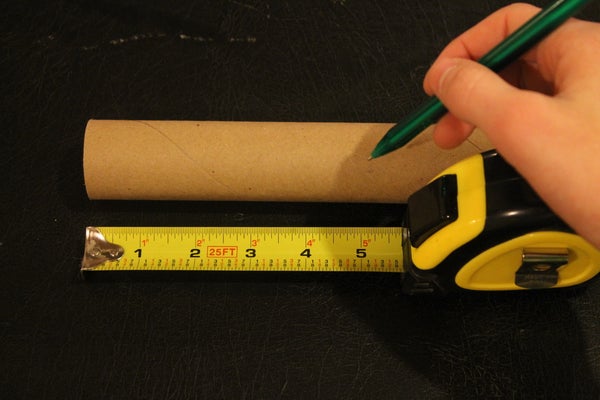
The first step of making a red dot sight is to cut your cardboard tube about five inches of length. For doing this easily, you can measure the length to five inches and mark the cardboard tube by using a pen or pencil. This measurement will be very helpful for you to cut the tube.
Now, cut the tube carefully along the marks and make sure that you don’t splash the tube sides.
Step: 3 Some Mathematical Calculation.

It is also an important and hardest step to make a red dot sight. To do this step, you need paper, pen or pencil, a ruler, and a calculator. If we talk about the Pythagorean theorem, which states that the a^2+b^2=c^2. To solve this equation, we can suppose that the A is the tube diameter, and B is the length of a tube that should be 1/2.
If we fill these numbers in the theorem, then we can easily find the length of the tube. So, after solving the equation, we get the answer of length about 8.5 equals to 2.915 we can round this figure to 3. Now we have the length size of the plastic piece, which is 3.
Step: 4 Cut The Plastic.
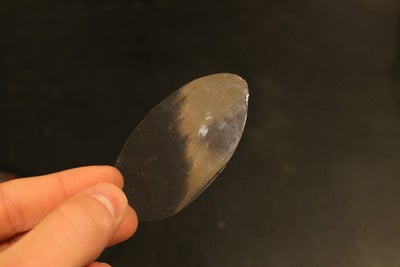
Now, cut the plastic of a length of 3. The width of a plastic piece is as same as a tube that was approximately 1.5 inches. To do this, firstly mark the piece of plastic in an oval shape by using the pen or marker, and then cut the plastic piece carefully along the mark.
This piece of plastic will be as same as a mirror that reflects the dot into your eyes made by the led.
Step: 5 Finishing The Job.
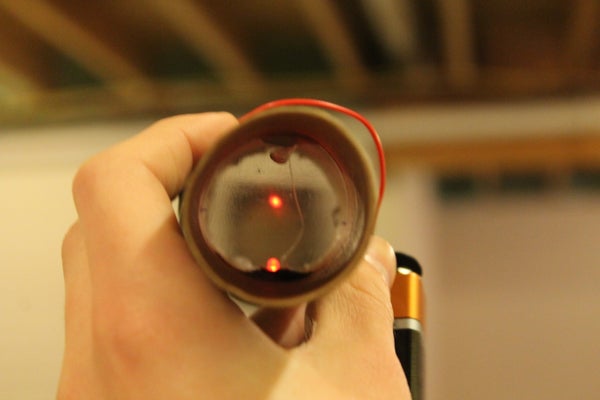
Now, place a hot glue bead on any one of the plastic’s short edges, and then slide this in your tube. Now with the help of your fingers, reach down the other end while holding the plastic of the tube to the bottom and the other end of the tube to the top at the same time. When the glue dries out, then put the hot glue to the other end of the tube to the top, next right to the opening.
Then cut a slit about inches of three quarters that must long above the plastic. Next, place the led module in this slit and continuously move around the led and in the center of the tube to see the dot. Continue this step until you see the dot at the end of the tube. It might take some time, and once you have the led, then hot glue it in that specific position.
Step: 6 Led Module.
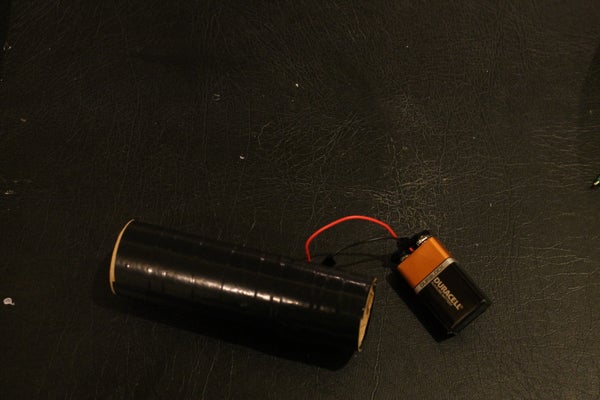
For making the red dot sight’s led module, spin the red positive wire to the resistor from the clip and the resistor to the led longer Led, and then spin the black wire to the Led short end from the clip.
Step: 7 Make It Better
After finishing all work, you can make it better any way you want. You can cover it by using any electrical color tape to make it more smooth and also cover the glue.
Making the red dot sight is not so difficult, and it takes only an hour or fifteen minutes to complete it. To making your own red dot sight, you can follow these steps and make it perfectly and easily. If you badly want a red dot sight for your shoot gun, then you have to try this and make this for your own. You will be amazed to use this.